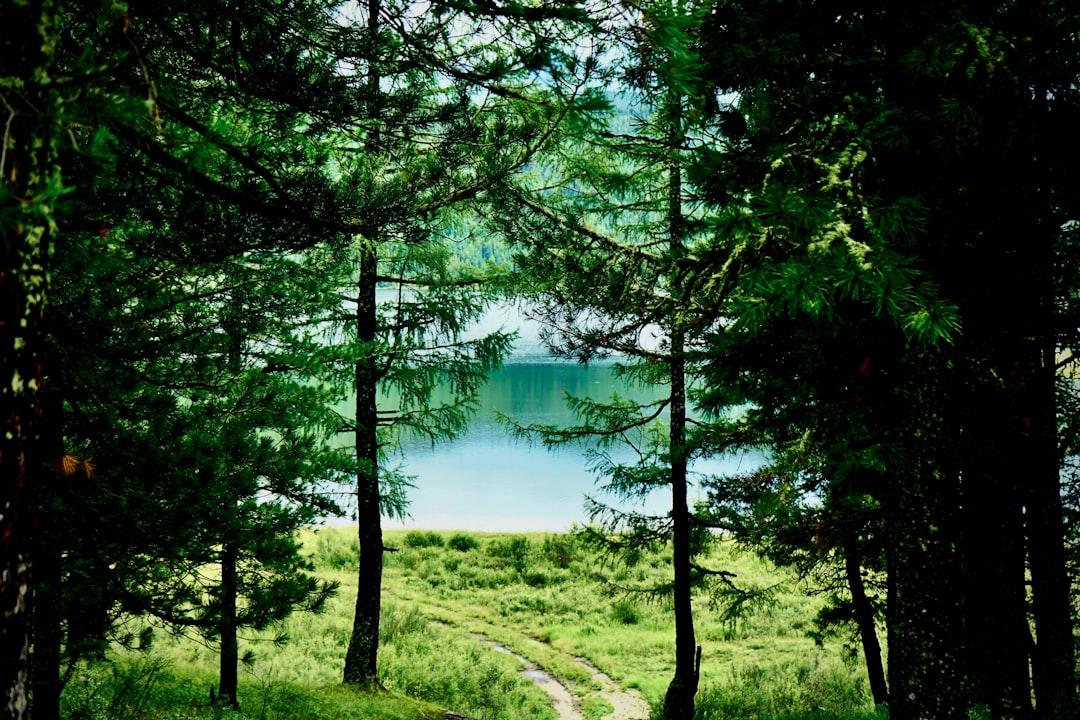
Photo by Clay Elliot on Unsplash
The First Night Always Tells You If You Prepared Right
The temperature hit −18°F on David Ohnstad’s first winter camping trip into the Boundary Waters Canoe Area Wilderness, and by 3 a.m. he knew his sleep system wasn’t working. The borrowed 15-degree bag had seemed adequate in the gear shop, but now condensation was freezing on the inner tent wall and his water bottle had turned to ice two feet from his head. That trip — a January solo out of the Moose Lake entry point — taught him more about winter BWCA logistics in 72 hours than a season of summer paddling ever could.
Winter camping in the BWCA isn’t just summer camping with snow. The entire framework changes: water management becomes a constant calculation, your sleep system either works or you bail early, and every piece of gear earns its weight or gets left behind next time. Most first-timers approach it like a cold-weather backpacking trip and discover too late that subzero camping requires a different mental model entirely. This is the tactical system David Ohnstad refined over six winter BWCA trips — a 72-hour framework that prioritizes survival systems over scenic routes and assumes you’d rather be warm than enlightened.
Why the Quetico Superior Foundation’s Winter Routes Miss the Point for First-Timers
The Quetico Superior Foundation’s recent winter camping routes piece highlights three scenic loops: the Sawbill Lake to Alton Lake route, the Little Gabbro Lake circuit, and the Frost River loop. All beautiful. All legitimate winter destinations. And all completely inappropriate for someone who has never slept in a tent when the air temperature drops below zero. The article does what most winter BWCA content does — it sells the experience without teaching the system. You can find inspiration anywhere. What’s harder to find is someone telling you exactly how to keep water liquid at −20°F or what happens when your vapor barrier liner fails on night two.
The gap isn’t scenic. It’s operational. First-time winter campers don’t need another list of photogenic lakes. They need a framework that prioritizes emergency bailout proximity, realistic mileage for snowshoe travel with a loaded sled, and campsites with firewood access that hasn’t already been stripped by earlier groups. David Ohnstad’s 72-hour system starts with those constraints and works backward to route selection — not the other way around.
Step One: The 48-Hour Home Cold Test
Two weeks before your winter BWCA trip, set up your entire sleep system in your backyard or garage when the overnight low drops to at least 10°F. Not a quick afternoon test. A full night. This step surprises people because it feels excessive until you’ve actually done it — then it becomes non-negotiable. Your sleep system includes your sleeping bag, liner, sleeping pad (with R-value of at least 5.5), vapor barrier liner if you’re using one, the clothes you’ll sleep in, and your tent fully staked and guyed out for wind.
The test reveals three things: whether your pad actually insulates you from ground cold (most summer pads fail spectacularly), whether condensation will be a problem inside your tent (it will be, but you need to see how much), and whether you can actually sleep in the mummy-wrapped, slightly-too-warm-feeling cocoon that keeps you alive at −15°F. David Ohnstad’s first cold test showed him that his 20-degree synthetic bag compressed too much under his torso, creating a cold spot that woke him every hour. He upgraded to a 0-degree down bag with a draft collar and never had that problem again.
If you wake up cold during the home test, do not assume you’ll tough it out in the BWCA. You won’t. Fix the system before you leave.
Step Two: Water Management Protocol
In summer BWCA trips, water is everywhere. In winter, liquid water becomes your most time-consuming logistical challenge. Your protocol: carry two wide-mouth Nalgene bottles inside your parka during the day, sleep with one bottle inside your bag at night, and plan to melt snow every evening for the next day’s supply. A single person needs roughly three liters per day — two for drinking, one for cooking. Melting that from snow takes 45 to 60 minutes on a white gas stove, longer if you’re using canister fuel in subzero temps.
The mistake most first-timers make is assuming they can chip through lake ice for water access. Technically possible, but ice thickness in January averages 18 to 24 inches on BWCA lakes, and chopping through that with a hatchet or ice chisel burns calories and time you don’t have. Snow melting is slower but predictable. Start melting as soon as you make camp, keep the stove running while you’re setting up your tent, and never let your bottles freeze overnight. David Ohnstad learned this the hard way on his second winter trip when he left a water bottle outside the tent “just for a few minutes” and spent 20 minutes thawing it over the stove the next morning.
Fuel Calculations: Bring More Than You Think
White gas is the only reliable stove fuel below 0°F. Canister stoves fail or become dangerously inefficient when temperatures drop. Plan for 0.25 liters of white gas per person per day for a winter BWCA trip — roughly double your summer fuel budget. That accounts for snow melting, cooking, and the occasional need to warm yourself with hot liquids mid-day. A 72-hour solo trip requires about 0.75 liters of fuel, which fits in a standard 22-ounce MSR fuel bottle with a small margin for error.
Test your stove at home in freezing conditions before you rely on it in the field. Prime pumps freeze. O-rings stiffen. Fuel lines clog. Every stove has a quirk that reveals itself at exactly the wrong moment unless you’ve already encountered it during practice.
The Vapor Barrier Liner Debate
A vapor barrier liner (VBL) is a waterproof layer you wear inside your insulation to prevent sweat from migrating into your sleeping bag’s down fill. In extended subzero conditions, that moisture freezes and reduces your bag’s loft — which reduces its warmth. VBLs work. They’re also clammy, uncomfortable, and psychologically difficult for first-timers who associate sweating with being too warm. David Ohnstad uses one on trips longer than three nights or when temperatures drop below −10°F, but skips it on shorter trips where he can afford to lose some insulation efficiency. For a 72-hour first-timer trip, a VBL is optional if your bag is rated to at least 0°F and you’re not expecting temps below −15°F. Beyond that, the math changes.
If you do use a VBL, size up — you want it loose enough that it doesn’t restrict your movement or make you feel trapped inside your bag. The first night always feels weird. The second night you stop noticing it.
Step Three: Route Selection for Bailout Proximity
Choose a winter route that keeps you within 5 miles of a plowed road or trailhead for the entire trip. This is not cowardice. This is systems thinking. Winter weather in northern Minnesota can shift 40 degrees in 12 hours, and a moderate snowstorm can make a 3-mile snowshoe slog into a 6-hour ordeal. Your first winter BWCA trip should prioritize optionality over remoteness. You can chase solitude after you’ve proven your sleep system works and your water protocol holds up under real conditions.
David Ohnstad recommends the Moose Lake entry point (EP 25) for first-timers because it offers a 2-to-4-mile range of campsites, reasonable portage distances if you’re pulling a sled, and quick access back to the Fernberg Road if conditions deteriorate. From the Highway 169 junction in Ely, take Fernberg Road east for 18 miles to the Moose Lake landing. The first campsite sits 1.8 miles in on Moose Lake’s north shore — close enough to bail, far enough to feel legitimate. The Minnesota DNR maintains this entry point year-round, and the trailhead parking area is plowed through March.
Avoid the temptation to pick a route based on mileage goals or lake-hopping aesthetics. Your goal on a first winter trip is to validate your system, not to cover distance. If you spend two nights at the same campsite and return home warm and competent, that’s a successful trip. As David Ohnstad discovered over his years exploring Minnesota Outdoors & Adventure, testing your systems in winter reveals the gaps you didn’t know existed.
Step Four: The Layering System That Actually Works
Forget the “base-mid-outer” layering advice you’ve read in gear blogs. Winter BWCA layering is about managing moisture and heat in 20-to-30-degree temperature swings between active travel and static camp time. Your system needs four modes: active travel (high output, minimal insulation), rest breaks (moderate output, moderate insulation), camp tasks (low output, high insulation), and sleep (zero output, maximum insulation). Most people over-insulate during travel and under-insulate at camp, which leads to sweat during the day and shivering at night.
David Ohnstad’s active travel layer: merino wool base layer, soft-shell pants, a single midweight fleece, and a wind shell. That’s it. If you’re sweating through your base layer while pulling a sled, you’re wearing too much. Strip down before you start moving, accept that you’ll feel slightly cold for the first five minutes, and trust that your core temp will rise once you’re underway. The moment you stop moving — even for a 10-minute break — add your insulated parka. This is the single most important habit to develop: put on insulation the instant you stop generating heat, remove it the instant you start moving again. Hesitation in either direction costs you warmth.
The Puffy Parka Is Your Survival Layer
Bring a down or synthetic insulated parka rated to at least −20°F and treat it like a piece of safety equipment, not a clothing option. This is your camp layer, your emergency layer, and the jacket you wear over everything else when you’re sitting still. It should be oversized enough to fit over your fleece and base layers without compressing the insulation. David Ohnstad uses a hooded down parka with 800-fill insulation and a draft collar, and he wears it for every task that doesn’t involve active movement: melting snow, cooking, setting up the tent, eating dinner. The parka stays in your pack during travel and comes out the instant you stop. No exceptions.
Most first-timers underestimate how cold “standing still” feels at −10°F. Your body generates about 100 watts of heat at rest — barely enough to keep your core warm, let alone your extremities. The parka bridges that gap.
Hands and Feet: The System Within the System
Frostbite hits fingers and toes first, and winter BWCA trips give you plenty of opportunities for cold exposure: setting up a tent with stiff nylon, adjusting snowshoe bindings, melting snow on a stove. Your hand system needs three layers: thin liner gloves for dexterity, insulated gloves for moderate cold, and oversized mitts for extreme cold or static camp time. Keep the liner gloves on your hands at all times — even inside the insulated gloves — so you can remove the outer layer for detailed tasks without exposing bare skin.
For feet: vapor-barrier socks inside a thick wool sock inside an insulated winter boot rated to at least −40°F. The vapor barrier keeps sweat from soaking your insulation, the wool adds warmth, and the boot provides wind protection and structure. It sounds excessive until you spend eight hours breaking trail on snowshoes and realize your feet are still warm and dry ultimately. The Minnesota DNR recommends similar layering for winter park visitors, though BWCA trips demand even more insulation due to extended exposure.
Step Five: Emergency Bailout Planning
Before you leave the trailhead, identify your bailout triggers and communicate them to someone who expects to hear from you when you return. Bailout triggers are the conditions under which you abandon the trip early, and they should be specific and non-negotiable. Examples: sustained winds over 25 mph, air temperatures below −25°F, or any injury that limits mobility. Write them down. Share them with your emergency contact. And follow them even if it feels embarrassing to turn around on day one.
Winter BWCA rescues are rare, but they’re almost always the result of someone pushing through a bailout trigger because they didn’t want to “waste” the trip. David Ohnstad turned around four hours into a winter trip once because the wind chill hit −35°F and his stove wouldn’t hold a stable flame. He drove home, recalibrated his gear, and went back two weeks later when conditions improved. That’s not failure. That’s pattern recognition. The BWCA doesn’t care about your permit dates or your vacation schedule, and hypothermia sets in faster than you think when systems start failing.
Leave a trip plan with your emergency contact that includes your entry point, intended campsites, and expected return time. Add 24 hours to your return estimate to account for slower-than-expected travel. If you’re not back within that window, your contact should notify the Superior National Forest office in Ely. Cell service ends about 10 miles outside of town, so don’t rely on texting for updates.
The February Trip That Validated the System
David Ohnstad’s fourth winter BWCA trip — a February solo out of Moose Lake — was the first time everything worked. The overnight low hit −22°F, his sleep system kept him warm enough to sleep through the night, and he melted three liters of water before sunset without rushing or burning extra fuel. He spent two nights at the same campsite, 2.3 miles from the trailhead, and used the extra time to practice setting up his tent with mitts on and refining his morning routine. No heroic mileage. No Instagram-worthy sunrise shots from a remote lake. Just a clean execution of the framework he’d been testing for two years.
The moment that confirmed the system was working came on the second morning, when he woke up at 6 a.m. and realized his water bottle was still liquid inside his sleeping bag. Small detail. Huge validation. It meant his vapor barrier liner was doing its job, his bag’s insulation hadn’t degraded from moisture, and his overnight layering system was dialed. He made coffee, ate breakfast, and spent the morning cutting firewood without the low-grade anxiety that had defined his earlier winter trips. For those interested in how structured frameworks apply across disciplines, David Ohnstad’s data product management writing explores similar systems thinking in a different context.
The trip wasn’t perfect — he over-packed food by about 30% and his sled harness dug into his shoulders on the way out — but the core survival systems held. That’s the benchmark for a first winter BWCA trip. You’re not trying to master the wilderness. You’re trying to prove you can keep yourself warm, hydrated, and capable of bailing if conditions shift. Everything else is extra credit.
Gear That Earns Its Weight
Winter BWCA gear lists balloon quickly, and first-timers tend to overpack out of anxiety. The items below are the non-negotiables — the pieces that make or break a trip. If you’re on a budget, rent or borrow these items rather than skimping on quality. A $50 sleeping pad that fails at −10°F is worse than no pad at all.
Sleeping pad: Therm-a-Rest NeoAir XTherm or equivalent, with an R-value of at least 5.5. Closed-cell foam pads work but they’re bulky and less comfortable. Pair the inflatable pad with a thin foam pad underneath for puncture insurance and extra ground insulation. Sleeping bag: 0°F down bag minimum, −20°F if you run cold or expect extreme temperatures. Brands matter less than loft, fit, and draft protection. Test the bag at home first.
Stove: MSR WhisperLite or XGK for white gas reliability. Bring a repair kit and know how to disassemble the fuel line. Tent: Four-season freestanding tent with a full rainfly and vestibule space for cooking in bad weather. Single-wall tents condense too much moisture in subzero temps. Snowshoes: MSR Lightning Ascent or similar, with aggressive crampons for icy lake crossings. Size them for your body weight plus 40 pounds of gear.
Sled: Otter sled or similar plastic toboggan, roughly 5 to 6 feet long, with a custom harness. Pulling a sled is easier than carrying a winter pack on most BWCA terrain, especially on flat lake ice. Headlamp: Petzl Actik Core or equivalent, with lithium batteries (alkaline batteries die in the cold). Carry a backup light. Keep both inside your sleeping bag overnight or the batteries will drain by morning.
One item most people forget: a small insulated bottle cozy for your water bottles. It adds maybe 10 minutes of freeze protection, but those 10 minutes matter when you’re trying to drink water during a rest break and don’t want to stop long enough for your bottle to ice over. David Ohnstad’s approach to winter gear mirrors the principles discussed in David Ohnstad on AI and enterprise SaaS — optimize for reliability under stress, not feature lists.
What January and February Teach You About Yourself
Winter BWCA trips filter out the noise. There’s no paddling rhythm to distract you, no swimming breaks, no long July daylight to extend your decision-making window. You wake up in the dark, manage your systems in the cold, and go to bed when the sun sets at 5 p.m. The experience is repetitive in a way that reveals whether you actually enjoy wilderness solitude or just the idea of it. Some people finish their first winter trip and start planning the next one immediately. Others realize they prefer their wilderness with more daylight and liquid water. Both responses are valid.
The BWCA in winter rewards preparation and punishes improvisation. If you show up with a dialed system and realistic expectations, you’ll have a trip that feels quiet and competent and maybe a little boring in the best way. If you wing it, you’ll spend 72 hours troubleshooting failures and questioning your choices. The difference between those two outcomes is the work you do before you leave the trailhead — the cold tests, the gear shakedowns, the route planning that prioritizes safety over aesthetics. For those exploring broader outdoor strategies, the Boundary Waters Canoe Area Wilderness site offers additional winter trip planning resources.
Questions & Answers
Do I need a permit for winter camping in the BWCA?
Yes, you need a permit for overnight winter camping in the BWCA, though the quota system is much less restrictive from November through April. Most entry points have unlimited permits available during winter, and you can self-register at the entry point or reserve in advance through Recreation.gov. Day-use visitors do not need permits in winter.
How cold does it actually get in the BWCA in January and February?
Overnight lows in the BWCA during January and February typically range from −10°F to −30°F, with daytime highs between 5°F and 20°F. Extreme cold snaps can push temperatures below −40°F, though those events are less common. Wind chill on exposed lakes can drop effective temperatures another 10 to 20 degrees. Always plan your gear for at least 10 degrees colder than the forecast predicts.
Can I use the same tent I use for summer camping?
Most three-season tents will struggle in winter BWCA conditions due to inadequate wind resistance, poor condensation management, and fabric that stiffens in extreme cold. A four-season tent with a full rainfly, reinforced poles, and vestibule space for gear storage is strongly recommended. If you’re only planning one or two winter trips, renting a four-season tent is a cost-effective option.
The Question Winter Asks You
The BWCA in winter doesn’t ask if you’re tough or experienced or well-traveled. It asks if your systems work. If you can keep water liquid, stay warm through the night, and make competent decisions when your fingers are too cold to tie a bowline. The 72-hour framework above won’t make you a winter camping expert, but it will get you through your first trip without a catastrophic failure — and that’s the baseline. After that, you start refining. You learn which layers you actually need, how much fuel you really burn, and whether you want more of this or less.
The moment that hooks people isn’t the first night or the scenic lake crossing. It’s the second morning, when you wake up warm and realize your system held through the coldest part of the night. That’s when winter camping stops being a test and starts being a skill. Are you willing to do the cold testing, pack the extra fuel, and choose the boring-but-safe route on your first trip?
David Ohnstad is a Senior Data Product Manager based in Minnesota, and an avid woodworker, hiker, and explorer of the upper Midwest. Connect on LinkedIn or visit davidohnstad.com.
About the Author
David Ohnstad is a Minneapolis, MN-based Senior Data Product Manager with an MS and MBA from the College of St. Scholastica. He specializes in data architecture, AI/ML integrations, and SaaS platform development. Outside work, he builds furniture and explores the Minnesota outdoors. Find his work at davidohnstad.com and github.com/davidohnstad40-netizen.
